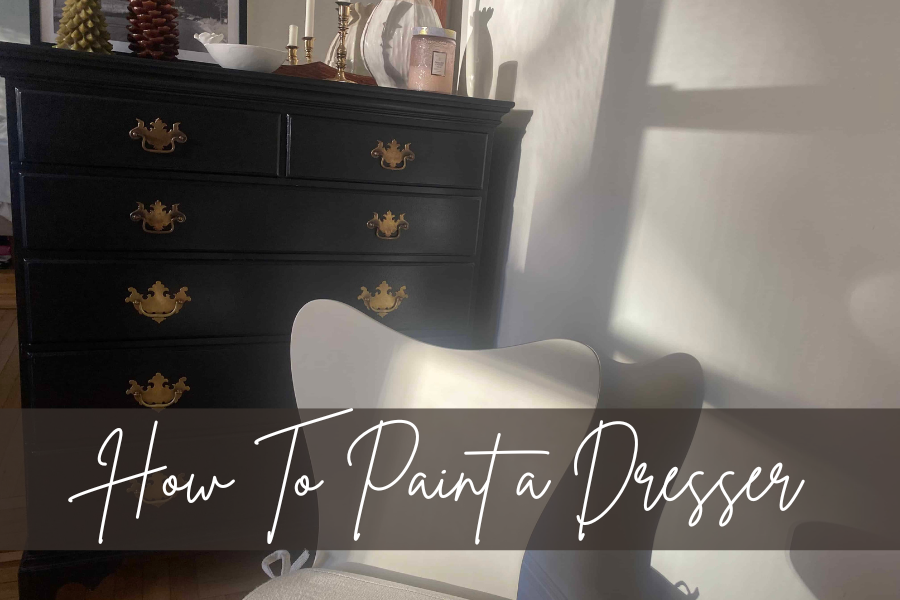
Have you ever wondered what the process of painting a dresser might be like? You’ve landed on the right page. Let’s talk about how to paint a dresser.
I had zero experience painting any piece of furniture before taking on this project. I had always had an obsession with black vintage dressers, not sure when it all started or where it came from. But I always wanted to have one and decorate it with neutral contrasting décor items.
One of my colleagues at work was moving to New Jersey and needed to get rid of the furniture she didn’t want to keep. Many of the charity thrift stores in New York City expect you to bring the pieces to the store yourself for donation, and it’s never guaranteed that they will take these items. So, she reached out to me to see if I was interested. The dresser was a childhood dresser, so very vintage. They don’t make dressers like these anymore. It had some water marks up top, and the third drawer was a little difficult to close (still is). But that was it. Of course, I said yes and right away I knew that this was going to be a painting project.
So how do you paint a dresser exactly? I went down a rabbit hole of watching several YouTube videos and reading blog posts of vintage dresser painters. It’s apparently a thing. People buy these, paint them and sell them for a much higher price. I was still at my rental property when I took this project on, so I made sure to leave no traces behind. I will let you know what you need to purchase, how to protect the floor and everything I did step by step to get this dresser painted.
This blog post is all about how to paint a dresser. Let me know if you intend to paint one!
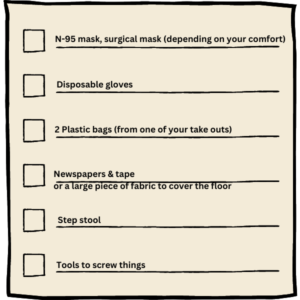
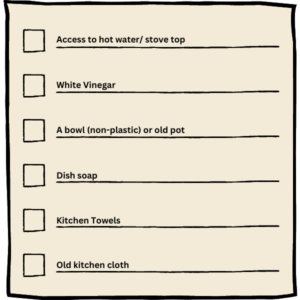
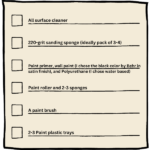
WHAT YOU NEED FOR THIS PROJECT
BEFORE YOU GET STARTED
If this is your first painting project, I got some things I’d like to share with you. Before you get into this project, I recommend opening the windows of your apartment, and putting on a mask on. Cleaning, sanding, and painting can create a lot of dust, particles and fumes. So, you need to protect your lungs.
Also, you don’t want your hands to get too dirty or painted, so wear disposable gloves you are comfortable working with.
You also want to protect the floor you are working on. I used a step stool to elevate my dresser and allow to me to paint it. I then covered the step stool and the floor with newspaper I taped to make one big piece. I’m sure you can purchase a large piece of fabric or plastic to do the job.
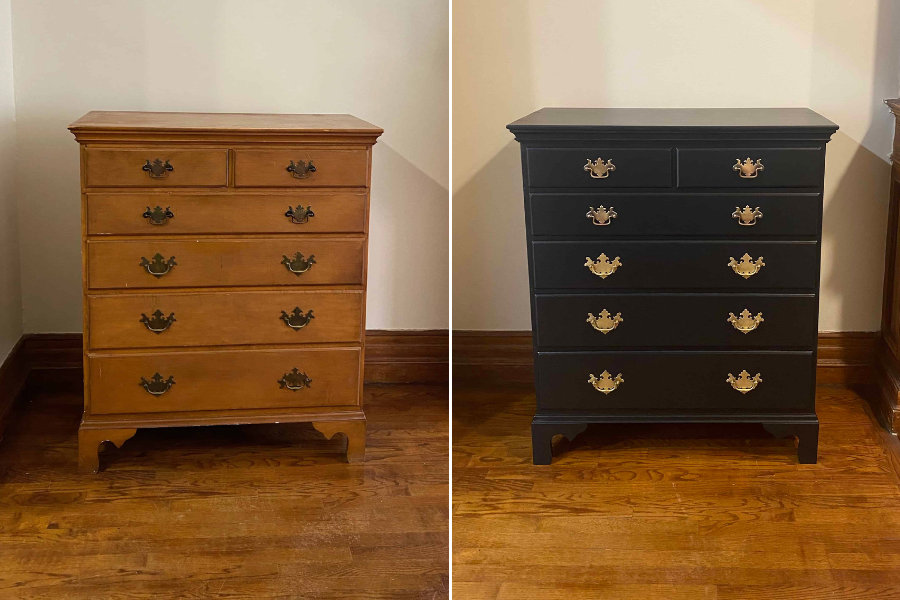
Make sure to see the before and after photo at the end!
HOW TO PAINT A DRESSER IN 10 EASY STEPS
#1 DRAWERS OUT & HANDLES OFF (20-30 mins)
Take out all the drawers from your dresser and remove the handles. You will be able to take the drawers out quite easily, but depending on how old your dresser is removing the handles might be a little more complicated. If you can’t figure it out, take a photo and take it to your nearby hardware store to ask for some advice.
#2 CLEAN THE HANDLES (30-45 mins)
I used water and vinegar to dip these handles in. Pour water 60% and vinegar 40% in an old pot and set it on low heat. Drop the handles in for around 30 mins, then give them a good scrub with dish soap and let them to dry until you’re done painting if you have the space to let them sit, or until they dry.
#3 CLEAN THE DRESSER (30 mins)
Use a clean wash cloth, kitchen towel, or whatever it is you have access to. I used a good old Trader Joe Kitchen Cloth, one that was near retirement because you don’t want to reuse this on kitchen surfaces when you’re done with your project. You can use an all-surface cleaner to freshen it up a bit. Clean the inside and outside of the drawers and any dust that was under the handles. Then wipe the dresser from top to bottom, including the space where each drawer went, that is where most of the dust and dirt collects.
#4 SAND THE DRESSER (20 mins)
Sanding your dresser is super important to even out the surface and more importantly get rid of the finish so you can paint it. I used a 220-grit sanding sponge. I needed two of those for my dresser and drawers. As I mentioned in the previous section, highly recommend using a mask here.
#5 WIPE YOUR DRESSER (20 mins)
After you’re done sanding your dresser and drawers, it will look dusty and covered in particles. Wipe it down all over again using water and a kitchen cloth as we did before, with your mask on.
#6 LET IT DRY (20 mins wait time)
Pretty self-explanatory. You might want to pass over the wiped areas with a dry kitchen cloth to make sure you don’t leave any wet areas, or just let it dry.
#7 APPLY THE PRIMER (30 mins and 1 hour wait time)
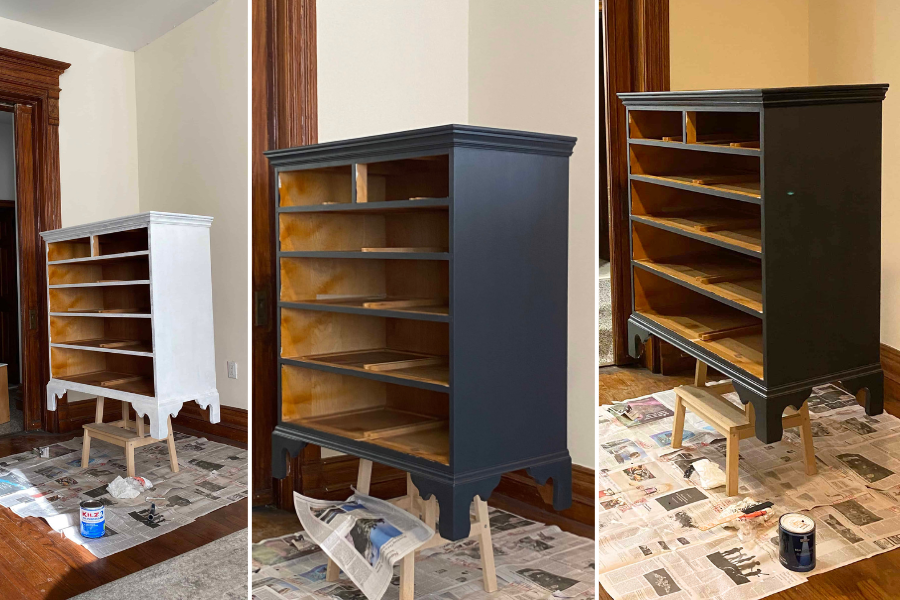
I picked up a paint roller, some sponges that go on the roller, and a typical wall paint primer and applied it anywhere and everywhere as seen in the photo. First mix the primer in the container it comes in, then pour it over the paint tray and use the roller to apply it on your dresser and drawers. I used plastic utensils to mix the primer (anything will do). Make sure to bring each drawer over a covered floor surface before applying the primer to avoid a messy situation.
You might feel a bit uncomfortable with the starking white color but I promise you, none of it will show through the paint. The primer leaves an almost grainy surface behind; this helps the paint stick and won’t necessarily show through it. If anything looks unusual and grainier that the rest of the surface, you can use the sand sponge to smooth it out, only after the primer dries though. Follow the direction of your primer and let it dry, I had to wait an hour. I left the roller sponge in a plastic bag to make sure it doesn’t dry, in case I needed to re-use it. I never did.
Left to Right: (1) after applying the primer, (2) after applying the initial midnight blue coat, (3) After the second coat of black paint.
#8 APPLY THE PAINT (30 mins and 1 hour wait time for each layer of paint)
Once the primer is dry, mix your paint (with a plastic utensil or anything), pour it on another plastic tray and use the same roller with a new sponge to paint the dresser and drawers. Cover it with one layer, make sure you are moving in one direction to give it a smooth finish. The small areas will need a paint brush, like the area between the drawers. Let the first layer dry following the directions on your paint container, I had to wait an hour. You can put the roller sponge in a bag to prevent it from getting dry as you are going to use it again for the second layer.
If any areas don’t feel smooth, sand it but only after it dries. Apply the second coat and wait for it to dry again. Smooth out any grainy surfaces. Put the roller sponge back in the bag (just in case you need to use it again).
As you may notice in the photos, I had to change colors. After applying the first coat I noticed that it wasn’t quite the dark midnight blue I was hoping for. I left the first layer as is and I used black as a second coat, it worked out perfectly. So, make sure you like the color when you’re done with the first coat.
#9 APPLY THE POLYURETHANE LAYER (30 mins and 24 hours wait time)
You can choose a wax based or a water based polyurethane layer to protect your furniture. I used a water based one, as I heard it is less toxic, but the downside is it doesn’t last as long. I was ok with the tradeoff as I didn’t have enough ventilation in my apartment.
Because my paint was water based, I was able to wash it off my brush quite easily. I mixed the polyurethane liquid in its container, and poured it in a plastic single use cup that my brush fits in. I used that to apply this last layer on my dresser and drawers, let them dry for a day before touching them. Although the recommended wait time for drying is only 30 mins to 2 hours if you’d like a second coat, I waited longer to make sure if was completely dry as it is the last protective coat.
#10 REASSEMBLE YOUR DRESSER (30 mins)
Apply the handles to the drawers and put those drawers back into the dresser and VOILÀ! I couldn’t believe the results. This was my first painting project and it had worked.
FINAL NOTE
On cleaning and washing: If you are using a water-based paint and polyurethane layer, you can wash your tray, roller and brush and re-use or donate them. They don’t have to go into the trash.
TIME IT TOOK TO COMPLETE THIS PROJECT: 4.5-5 hours of work at most
TOTAL TIME (INCLUDING WAIT TIME): 35 hours
Before and After photo, voilà!
This blog post was all about how to paint a dresser. Let me know if you tried it, I’d love to hear about your experience.
As always, thank you for stopping by and reading.
Feel free to follow me on instagram @girlontheues
See you next week,
Girl on the Upper East Side
Xx
If you enjoyed reading this you might enjoy reading about my top rainy day activities and how to keep your New Year resolutions.


 Took my #LadyBag everywhere. Kha


[…] related posts you might be interested in: How to Downsize your closet, How to Paint Your Dresser, How to Keep your New Year […]