Do you want to know the best strategy on selling your clothes on Poshmark? These are my tried-and-tested methods on how to be successful on Poshmark.

About 8 years ago, Poshmark played a huge part in my ability to declutter my closet and primarily get rid of fast fashion clothes. I introduced my story in a previous blog, but in this post I am going to talk in depth about how Poshmark operates and what it takes to be successful on this platform.
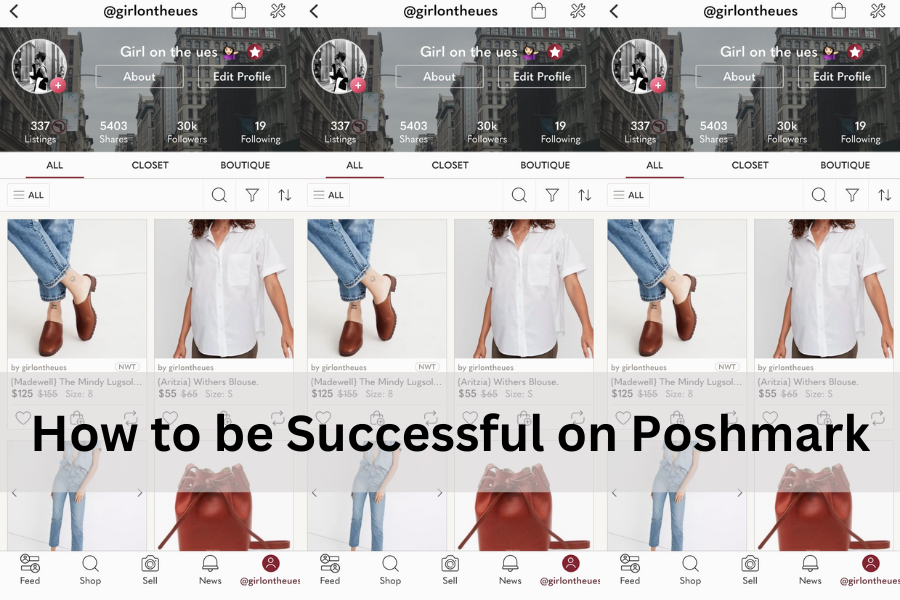
I am a Poshmark ambassador and as of today, I have 44,109 followers, sold over 318 items and made $10,750.90. Those numbers vary depending on whether this is someone’s full time job, if they are resellers or simply selling what they bought and used. It is the latter for me. My Poshmark closet is @girlontheues. Feel free to refer to it to follow along in this post or for inspiration.
This blog post is about all that I have learned on how to be successful on Poshmark
1. Poshmark 101 for Beginners
 Poshmark is a California based company, operating through a platform where you can buy or sell, new or secondhand items. Poshmark allows you to create a digital closet that people on the platform can browse and shop from.
Download the app, because it’s easier to operate through it. It is free, so you have nothing to lose. Open an account and introduce yourself. Pick a username, get creative and have fun. You are only allowed a certain number of username changes, so keep that in mind. Create an ‘about me’ post and introduce yourself to the community. Nothing personal. Poshmark will prompt you on how to structure it. It is usually in the lines of what brands you love and encouraging people to drop a comment so you can check out their closet. You will notice that almost everyone has some sort of variation of this for their bio as it is standard. Note: you can use my code ‘GirlonUES‘ for a 10$ credit.
2. Familiarize Yourself with the App
Play around with the app and get to know some of its features. When you first open your app, at the bottom of your screen you will see 5 menu items.
(1) Feed: similar to the Instagram feed where all those you follow show up top, you can click to see their closets. You will also see all that is shared by those you follow on this page.
(2) Shop: this is where Poshmark creates icons of your favorite brands as a shortcut for you to use while browsing. It learns this information from your searches on the app. The most important feature of this page is the ‘Parties’ section (more on why it’s important later); click on an upcoming party, then ‘View Party Details’ then ‘View Posh Party Guidelines’, there you will see two sections, ‘Brands Allowed’ and ‘Categories Allowed’. Poshmark will create a party either based on select brands (with a similar price point or style) or select category such as maternity or pets. It is important to check this information so you know what you can and cannot share to a party, otherwise each time you attempt to share an item that doesn’t fit the theme, Poshmark will prompt you (it’s annoying).
(3) Sell: It will take you directly to the camera option so you can take photos and list your item. I take all my photos through the Poshmark application for optimal sizing.
(4) News: This is your notifications page, where any new follower, share, comment, offers, and purchase alerts show.
(5) Your username: takes you to another menu, more specific for you as a buyer and seller.
3. Guidance from Poshmark
Once on the app, click on your username at the bottom right corner. A whole menu will pop up. Do not dismiss the first two items as they are great resources to understand how Poshmark operates. When I started selling things back in 2015, there wasn’t a lot of information online as you can find now. So these were my resources. Read the Posh Etiquette, so you understand how to communicate appropriately on this platform. Then read ‘Your Guide to Poshmark’ to get specific information about all things related to listing, shipping and buying.
What distinguishes Poshmark from other platforms is that it presents itself as a community. It is generally understood that once you create a closet with a few items and people share your items, you will share items from their closet too, and in doing so you each make these items visible to different communities (i.e. followers). It is also good practice to follow the people who follow you, so you each grow your followers.
4. How to List Your Item
After going through my closet, and deciding what I want to sell. I wash the things that need to be, then I start taking photos.
You need good lighting as your photos are everything on Poshmark. I usually look for the item online and use a staged photo from the brand as my first for inspiration. I then take my own photos of the item on a hanger with a simple white background. As much as I try to make my photos look pretty, I want people to know exactly what they’re getting, so be honest about the condition of your item and post as many photos, especially of the problematic areas. You don’t want items bouncing back or sellers losing trust in you. Whatever the defect may be, someone might be fine with that. As long as you show it or describe it – you are off the hook.
5. How to Describe Your Item: Very Important
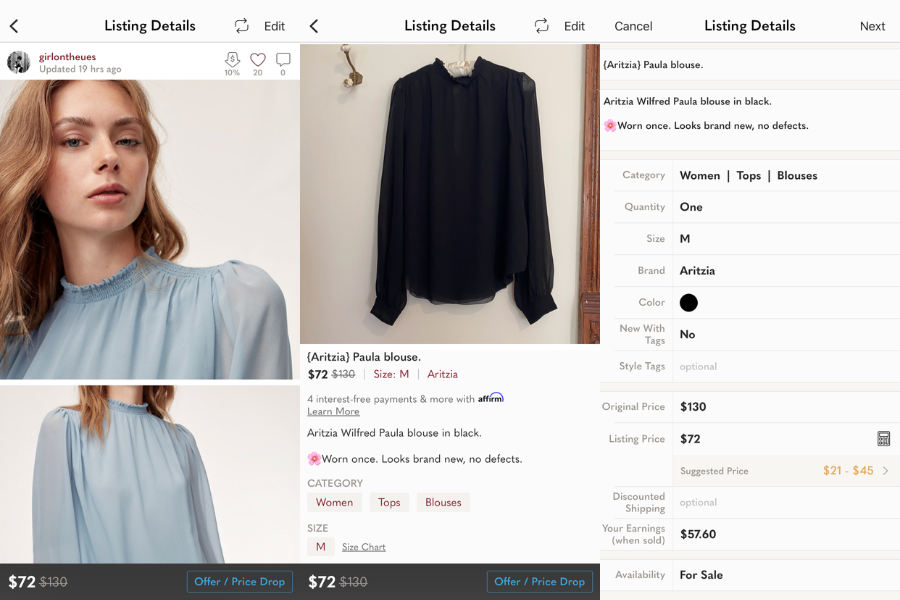
First, fill out as much of the fields as possible:
- Category, required
- Quantity, optional
- Size, required
- Brand, optional
- Color, optional
- New with Tags, optional
- Style Tags, optional
- Original price (you paid when you bought this item), required
- Listing price (you are listing/ selling it for), required
- Discounted shipping, optional
- Your earnings – this field is calculated automatically based on the information you provided (price – discounted shipping & Poshmark fees = your earnings).
- Availability, defaults to for sale
Make sure to include the item’s name, for example ‘Paula Blouse from Aritzia’, I will include this in the title and description, as I want my item to pop up when the name is being searched for. You’d be surprised by the number of people who search for a specific item on this platform (especially when sold out), rather than simply browsing through the inventory.
I make great use of the description box to further describe my item in great detail. I will describe the condition, mention the number of times it was used for, and then mention the defects (especially when I couldn’t capture them in photos). I will list the things that the item will come with (such as dust bag, box, etc). I will do this in a bullet point system so it’s easier to follow, but instead of boring symbols I use emoji flowers.
I fill out all the fields listed above with the exception of Style Tags, I never felt it added anything to my listings.
Don’t forget to check the ‘New With Tag’ box for items that still have the tag attached to them, as Poshmark will clearly designate your item with a ‘NWT’ sign. Those are sought after items, as you can imagine.
I do not measure every item, with the exception of bags and accessories. You can put a coin for sizing reference, especially for jewelry. You can measure the item yourself, or post the brand’s sizing and fit section, if it is available online. But I will provide measurements if I am asked by a potential buyer.
6. How to Price Your Item
Do a little search for how much your item is going for. You can also see the previously sold items to gauge. Items that are sold out are priced very differently from the ones that are still in stock, as you can imagine.
There are a few things to keep in mind here. Form your perspective as a seller, you want to price your items a little higher than what you would sell them for, to allow people to make you offers (people love to get a good deal). Remember that Poshmark takes 20% of your profit each time you sell something for more than $15, and a $2.95 flat commission when the selling price is less than $15.
Your buyer on the other hand, is paying sales tax and shipping $7.97. So you want it be worthwhile for you, of course, but also still a good deal for the buyer. USPS Shipping rates have gone up over the years, so it’s a reality you have to work with.
7. How to Store Your Items
Dedicate a corner in your closet to store all the items you listed. I either hang the clothes or put them in a plastic storage box. I put the shoes in their box. I do not wear those items once they are listed because I do not want the condition of the item to change. I store them with everything I said I would ship them with in my listing, such as the cute tote bag it came with or tags I held onto (especially with more luxury or designer items). The last thing you want is to be looking for the item after you’ve made a sale or have to cancel because your item can’t be found.
8. Visibility and Gaining Likes
You want your items to be seen, liked and purchased. That is the goal. Sharing your items at Poshmark Parties (4 times a day) can help you sell your items faster. The most important one is the 10 pm EST party, where a large number of Poshers join and sharing your item to those parties can increase visibility. There is always a theme, and it is best to make sure your items fit the theme. The other 3 parties are restricted to a selection of brands or categories on rotation. Refer to section 2 (2) as I explain this further, in case you skipped it.
When you are new to the platform, leave your notifications on so you are reminded by these events.
This blog post is about all that I have learned on how to be successful on Poshmark – Part I
Click Here for PART II
As always, thank you for stopping by and reading. If this content interested you, you might want to follow my Instagram account @girlontheues
See you next time,
Girl on the Upper East Side
Xx
Other related posts you might be interested in: How to Downsize your closet, How to Paint Your Dresser, How to Keep your New Year Resolutions.


[…] This blog post is Part II of the How to successful on Poshmark: The Ultimate 17 step guide. If you have not read Part I of this post, please start off with that right here. […]